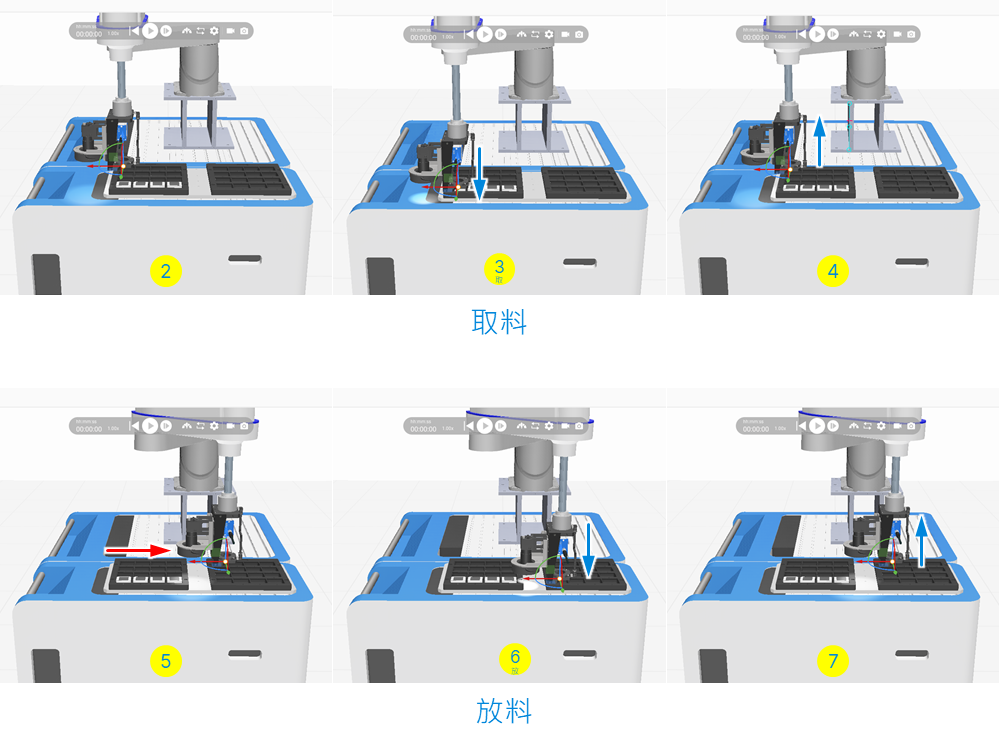
Through the application example of "Operating visual guidance to pick and place workpieces from tray A to tray B", following these 7 major steps will help you understand how to correctly operate robot commands in the Program and comprehend the pick-and-place action logic:
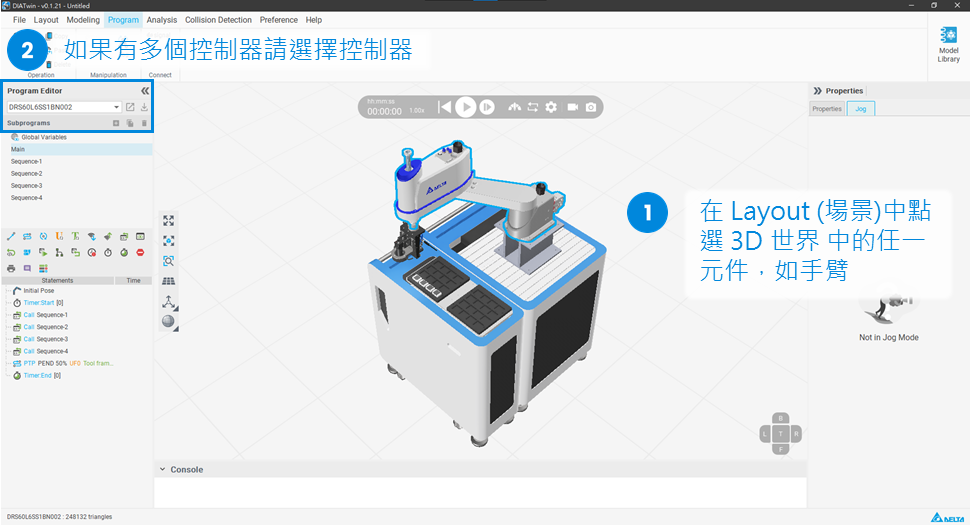
In the Program, first verify if the project components have controllers. Only components with controllers can be operated and controlled. If a component in the 3D world has a controller, this controller will be selected by default. If there are multiple controllers in the project's 3D world, users will need to select their desired controller for editing.
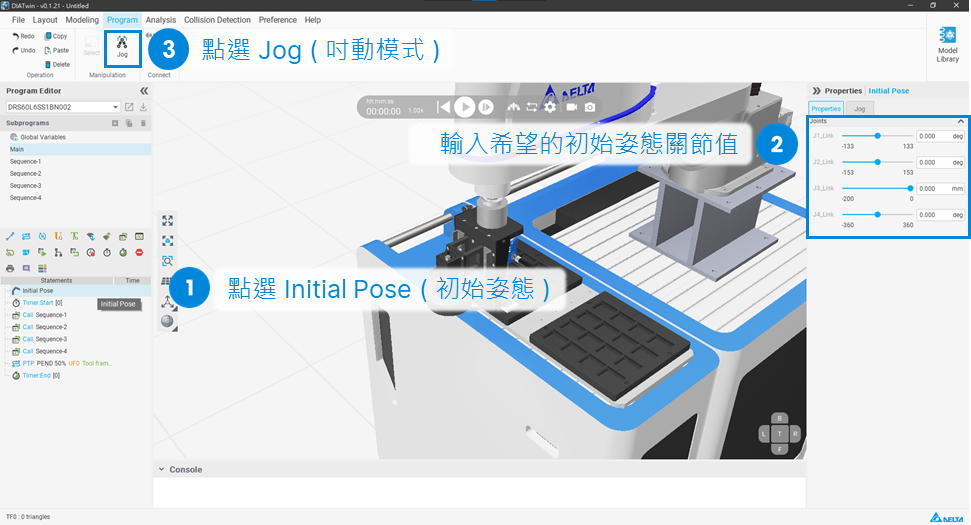
Under "Program", select Initial Pose and input the desired initial joint values, then select Jog mode. The robot will immediately move to the specified joint position.
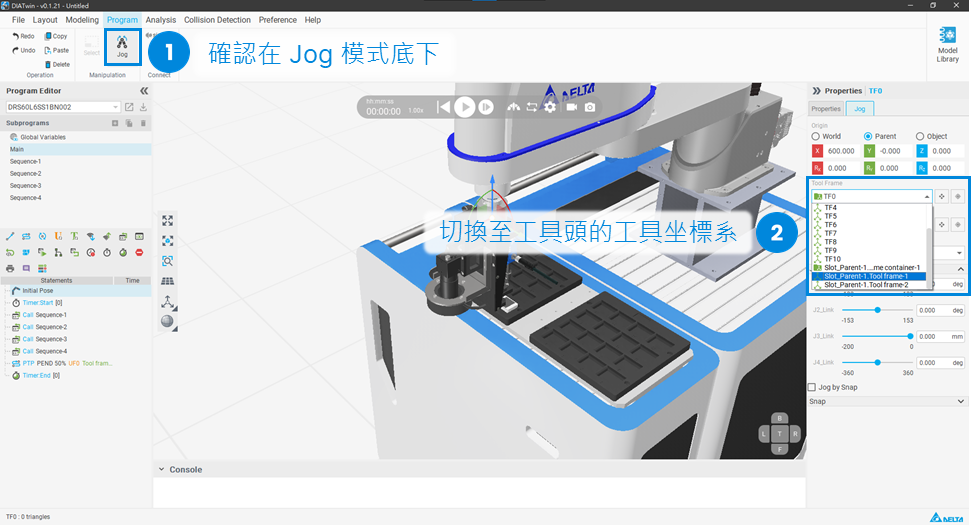
In "Jog" mode, select the "Tool Frame" coordinate system. Generally, the tool coordinate defaults to TF0 position. When a component with a controller, such as a robot arm, is assembled with other components like a tool head "Slot", the tool coordinate can be switched to the built-in tool coordinate of the tool head.
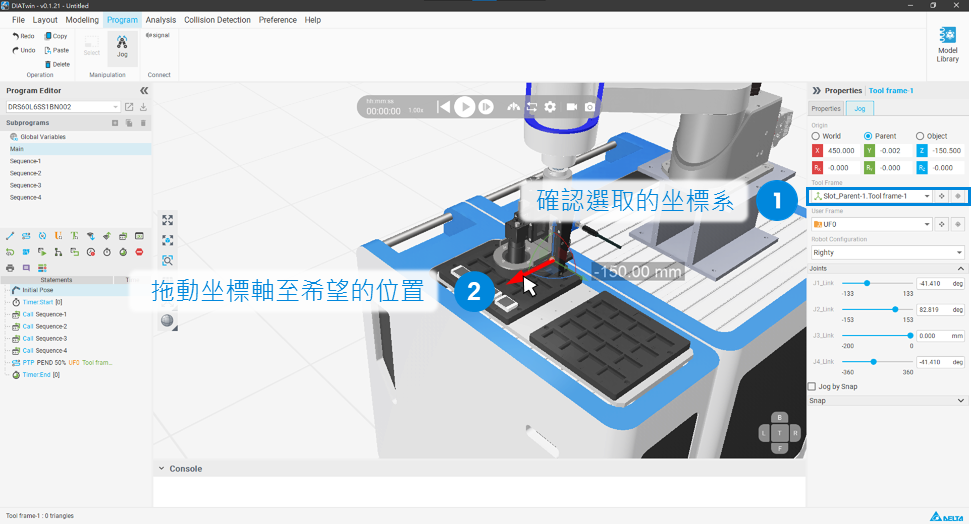
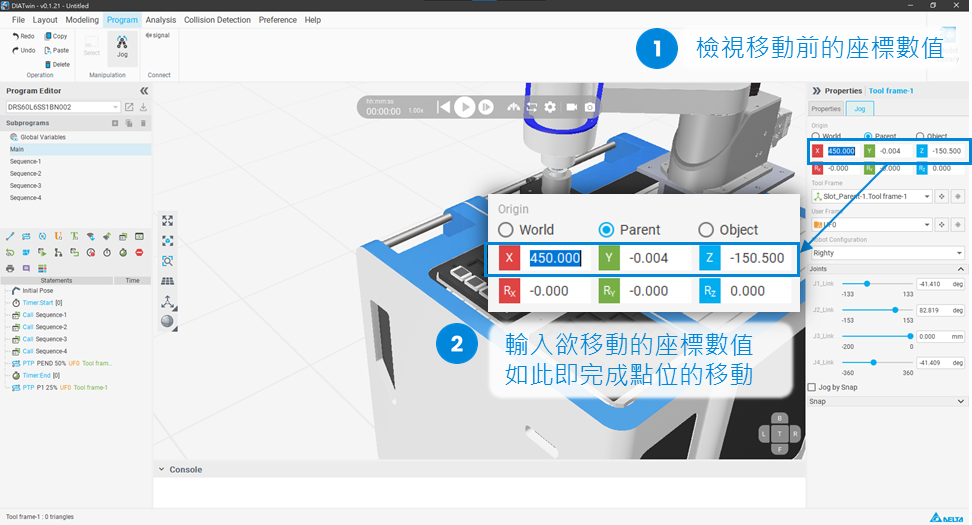
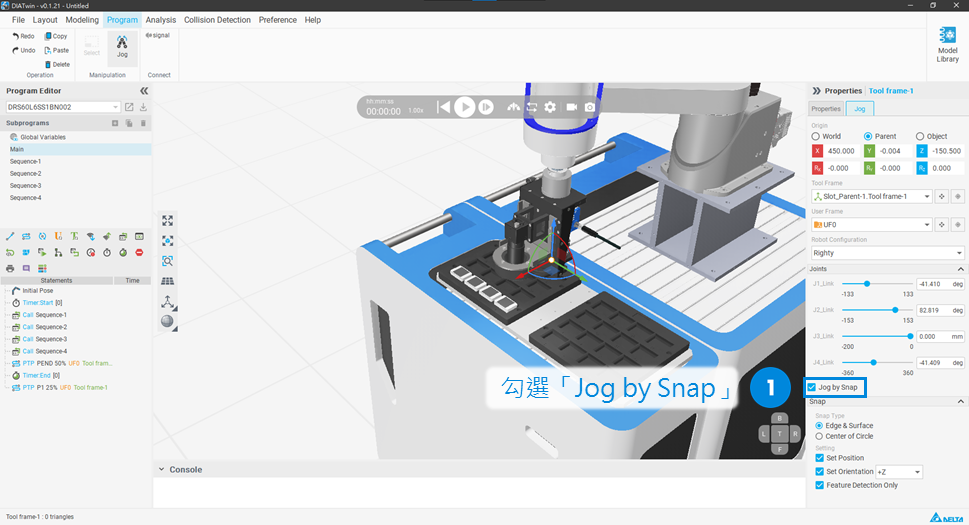
There are several methods to move the robot to desired positions:
When operating robot movements, it's recommended to flexibly use these 3 methods for more efficient position adjustments.
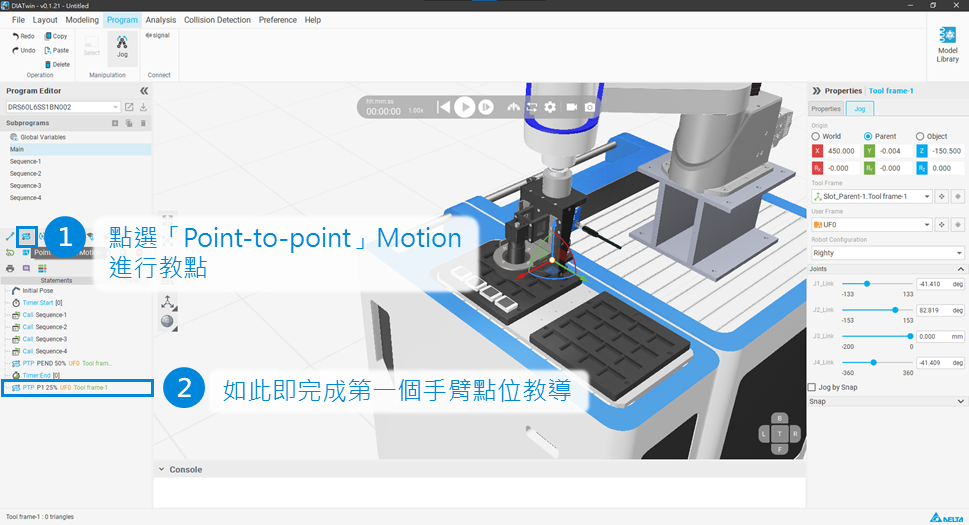
Select "Point-to-point" Motion for point teaching. In this example scenario, the robot's end-effector suction cup needs to pick up specific workpieces from the picking tray and move them to specific positions on the placing tray.
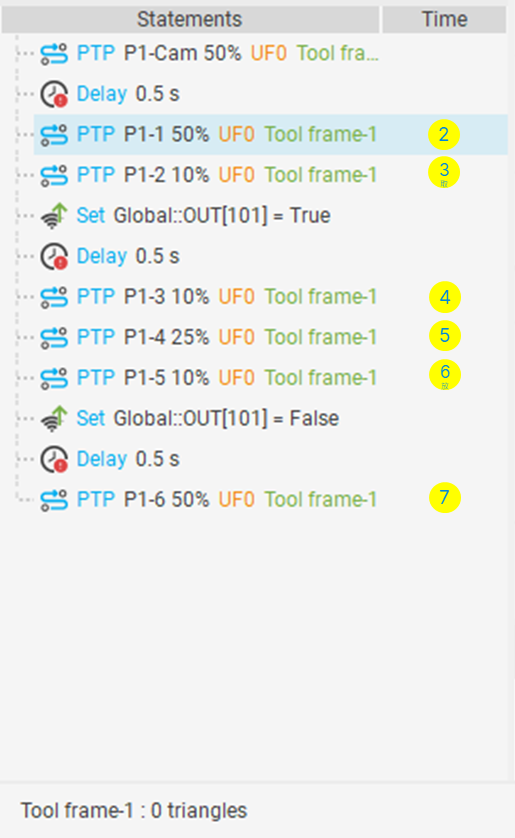
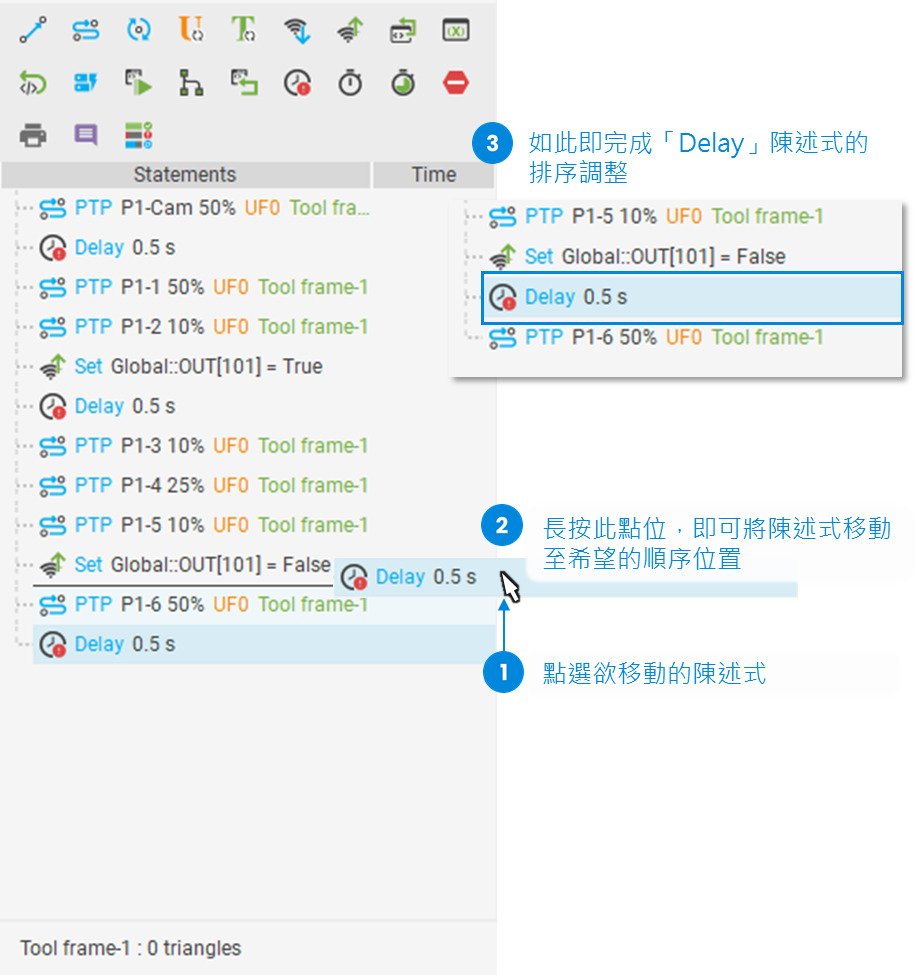
When teaching points, if you need to adjust the sequence of points or other statements, follow these steps to modify specific statements:
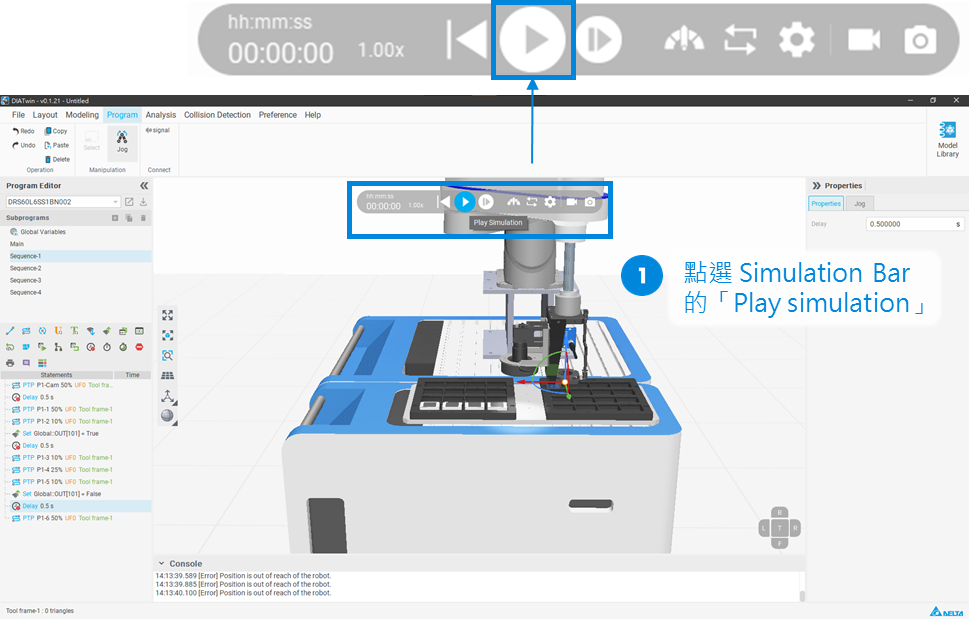
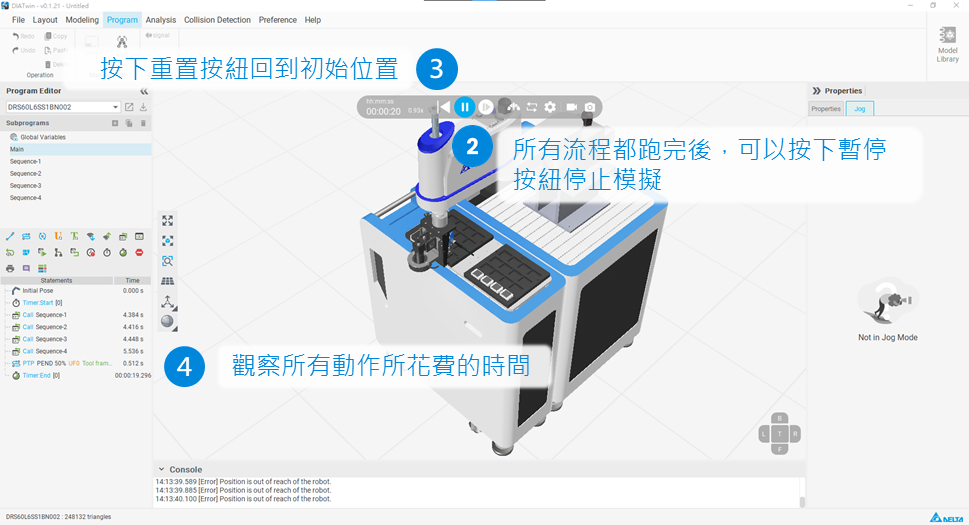
Follow these steps to complete the process simulation: